





Arepas de Harina (Venezuelan Flour Arepas)
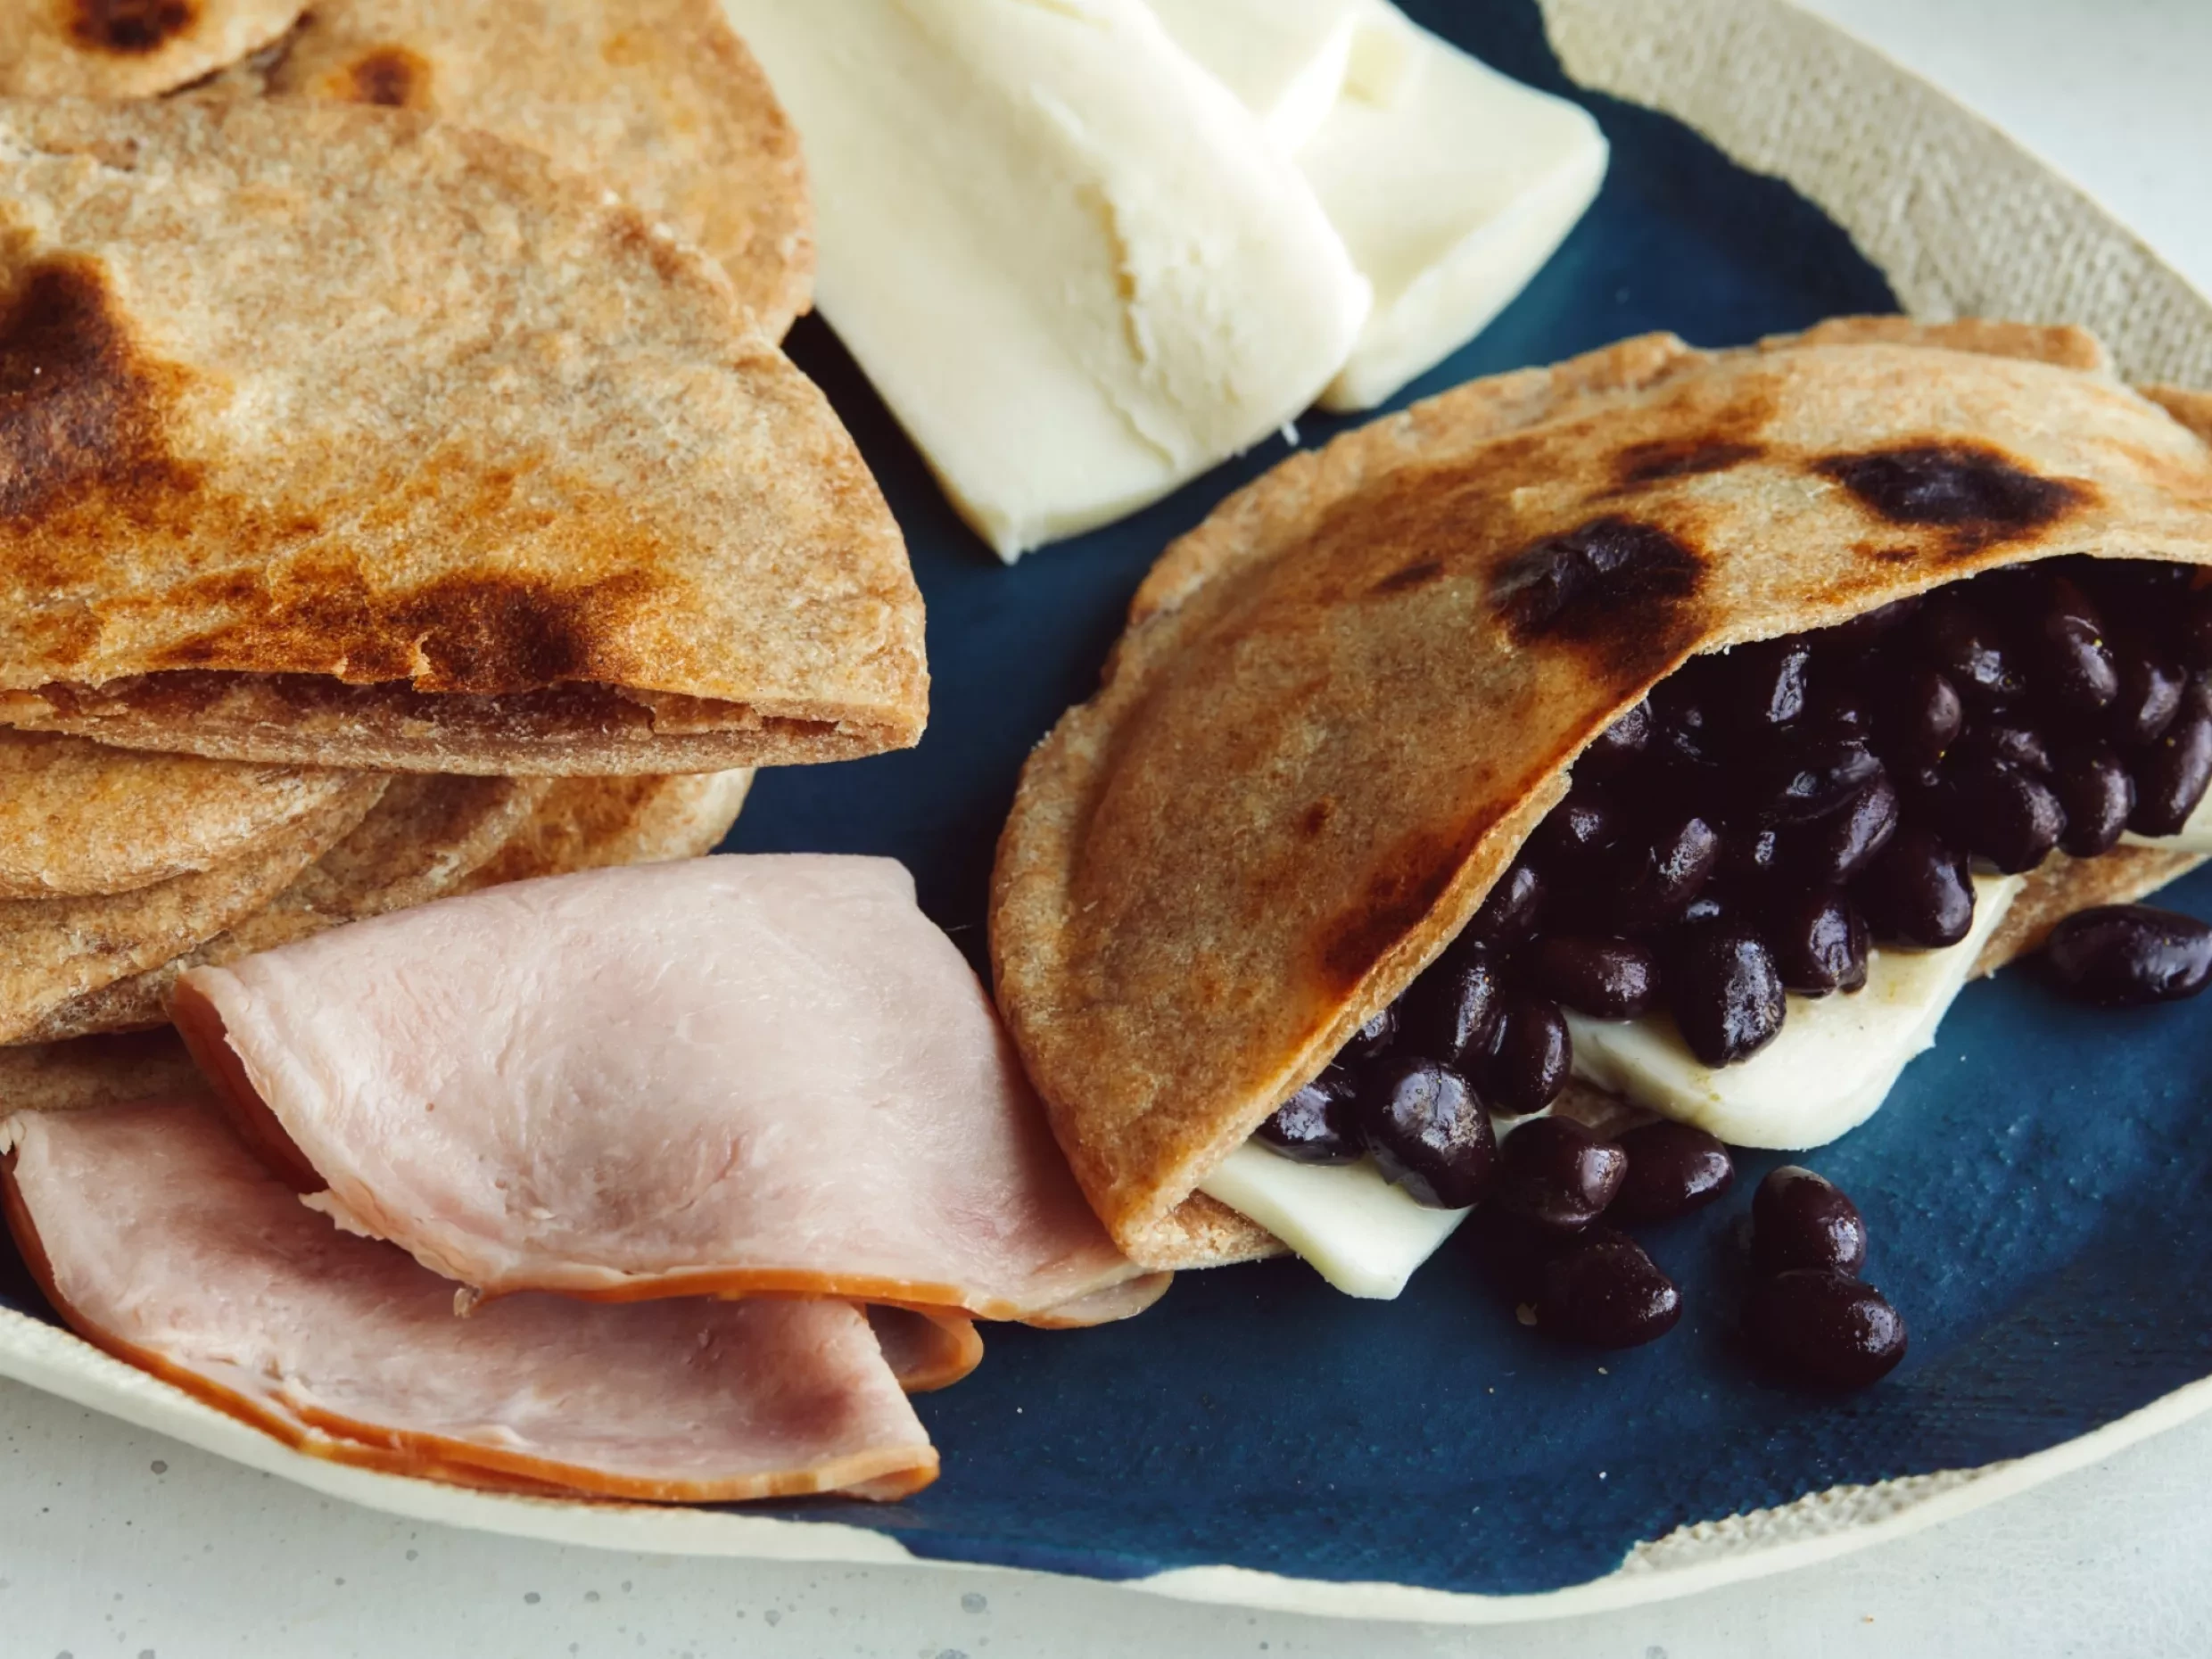
"Arepas are as Venezuelan as it gets. Most households always have some on hand, whether to use for sandwiches as a main meal, or to eat on the side. The corncake version gets most of the attention, but this version from the Los Andes region of Venezuela is my favourite. Arepas Andinas, also known as arepas de harina (flour), get their name because unlike their cornmeal counterparts, these are made with all-purpose and whole-wheat flour. The result is a wider, thinner pocket that can hold more filling, which is clutch if you're trying to fill these up with black beans like I usually am."
Related Recipes

Ingredients
Method
- Sift the plain flour, wholemeal flour and salt into a large bowl. If any bits of flour remain after sifting, add them to the bowl as well. Use your fingers to distribute the flour and salt evenly, if necessary.
- Spread your fingers apart to form a claw with one hand, then begin circling the flour mixture. Slowly drizzle in the oil with your other hand, continuing to circle with your fingers to create small, pea-sized clumps. Squeeze any larger chunks and separate them with your fingers.
- Pour approximately 2 tablespoons of the warm water into one corner of the bowl and mix a mound of flour with your hand, staying in that corner, until the water is absorbed and a clump of dough forms. It should feel pliable but dry. Transfer this dough to a work surface and repeat with another mound of flour, until approximately 2 tablespoons of water remain. Transfer each newly formed piece of dough to the existing pile. When only a little flour remains, add the water 1 teaspoon at a time, using just enough to gather most of the flour. You may not need all the water; it is better for the dough to be too dry than too wet.
- Combine all the pieces of dough and knead on your work surface until everything comes together, 1–2 minutes. If the dough is too sticky, lightly dust the work surface with wholemeal flour. If the dough is still crumbly, knead in a few drops of water until it holds together but is not sticky. The dough should be dry enough that you do not need to flour your work surface.
- Shape the dough into a vertical log and knead a little at a time, starting at the top and working towards you. Fold over 2.5cm and knead, then fold over 7.5cm and knead again, followed by 10cm, continuing in this way until the dough accumulates at the sides, forming a horizontal log. Position the log vertically again and repeat this process seven more times. Once finished, the dough should be smooth and uniform.
- Roll the dough into a neat log and cut into six equal pieces, each weighing just under 115g. Working with one piece at a time, knead the edges of the dough towards the centre, turning it slightly after each knead until you have turned it through 360 degrees. Gather all the edges together in the centre, then gently push the centre down to resemble a flattened soup dumpling, keeping the shape as round as possible. Flatten it slightly, remembering which side has the gathered ends. This will be the ‘tail’, while the smoother side will be the ‘face’.
- Heat a medium cast-iron frying pan over a medium-low heat, or a non-stick frying pan over a medium heat. Lightly oil the cast-iron pan using a kitchen towel. If using a good non-stick pan, there is no need to add oil.
- Roll out each arepa, tail-side down, to approximately 15cm in diameter. Place in the pan, face-side down, and cook until the face is opaque, 35–40 seconds. The aim is to cook the surface very lightly and evenly; it should remain mostly pale, although a few small, light-brown spots are fine. Flip and cook until the bottom is completely opaque with some larger golden-brown spots, 90 seconds–2 minutes. A little charring is normal. Flip once more and watch the arepa puff up. If you see a small hole, press down with a spatula to trap the air inside. Once the arepa has puffed up, approximately 30 seconds, transfer to a clean tea towel or napkin and wrap to keep warm. Repeat with the remaining arepas and serve immediately.
- To serve, cut the arepas into half-moons and fill, or slice them into two rounds and sandwich the filling between them. My favourite fillings are black beans and queso duro (a salty, hard white cheese), or ham, crema and queso duro. You can also mix crema with grated queso duro to spread inside the arepas. Plain arepas can also be served as an accompaniment to other meals.
Cook’s Note
Look for queso duro (hard cheese) at a shop or market that sells Latin American ingredients.
Rate this recipe
Overall Rating:
4.00
()